Description
Description
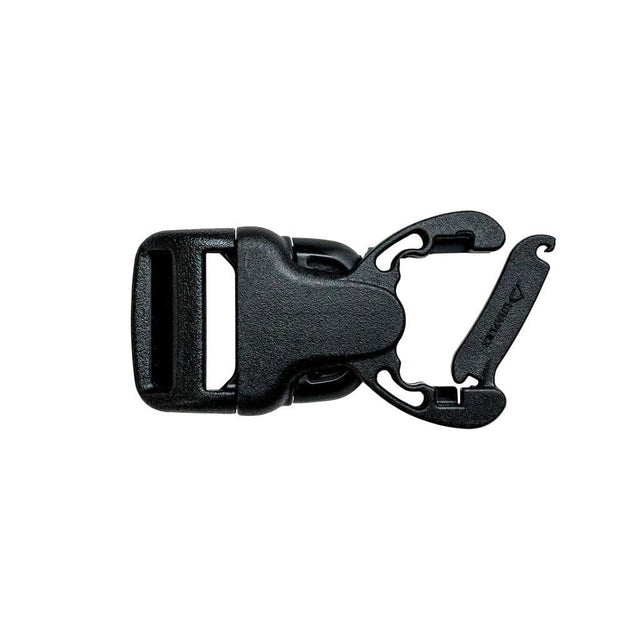
Most buckles on packs and bags are stitched in: the webbing is folded through the buckle and sewn into a loop, so when the buckle cracks you cannot just slide a new one on. The Gear Aid Snap Bar Repair Buckle has a bar on one half that swings open. Pass it through the sewn loop, press it shut and the new buckle is on, with the original stitching untouched and no needle anywhere near the job.
What it fixes
A side-release buckle on 20 mm or 25 mm webbing where the strap is sewn into a loop at the buckle:
- Sternum straps, lid straps and side compression straps on packs.
- Closures on roll-top dry bags.
- Webbing belts and the straps on jackets and clothing.
Choose the size by the width of the webbing, measured flat across. Our 19mm size is Gear Aid's 3/4 inch buckle, which Gear Aid mark for 20 mm webbing. Our 25mm size is the 1 inch buckle, for 25 mm webbing.
The snap bar is on one half only; the other half takes the strap through a standard slot. When both ends of the strap are sewn into loops, as on many dry bags, the Gear Aid Dual-Snap Bar Repair Buckle has a snap bar on both halves.
How to use it
- Cut away the broken buckle, taking care not to nick the webbing or the stitching.
- Open the snap bar, slide it through the sewn loop and press it closed until it clicks home.
- Thread the other strap through the slot on the second half.
- Clip the halves together and pull hard on both straps to check the bar has seated.
We stock the Snap Bar because it is the fix that saves a favourite pack over one broken part. Tuck one of each size in the repair kit for a long walk like the Larapinta, where the nearest replacement is a long way off, and a snapped sternum strap buckle becomes a job for the lunch stop.
Looking after it
Rinse grit and salt out of the buckle with fresh water after beach and river trips. Sand in the latch is what wears the clip arms and stops a snap bar closing fully.
Specifications
Specifications
-
Type
-
Compatibility
-
Length
-
Height
-
Width